
Building the new Garvey, Pete's Banjo
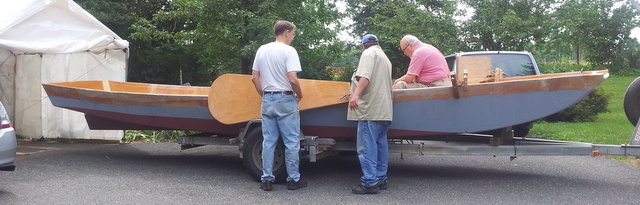
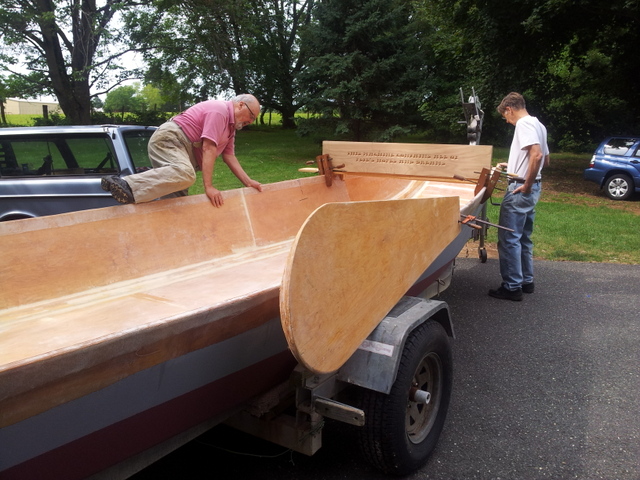
Construction is finished for a replacement for Clearwater's Garvey. The existing Garvey has served us well for 27 years, and has been donated to Tuckerton River Sailing Musuem, Tuckerton, NJ. The original garvey was built there in the early 18th century, and to this day is known as a Tuckerton River Sailing Garvey. This page will keep you posted on how construction develops.Update: We completed the boat in June, 2015, and launched July 11. Many sails this summer. Commissioning party September 9. Hauled it for the winter during the Joaquin hurricane threat. Read "How we Built a Garvey" for the full story. -- Tom
Ed note: The following log has a mix of entries by myself and Rik. There is overlap between this log and the above Picture Book. Probably Rik and I need to merge these, and turn the following scroll-down version into a teaser for the Reading. -- Tom Gibson
Log
(Needs updating)
December 16, 2014
I collected about 50 of our huge pile of photos and added narrative. This covers the entire project from conception to winter storage. It is about an hours read, or quicker if you just look at the photos. Its listed above as "Winter Reading." Check it out.
Tom Gibson
November 28, 2014
The boat is moved to my back yard from the garage, and covered for the winter. It is almost finished, just a bit of interior work and the decks and a paint job. On a warm day I pull the cover back and do a bit of work, usually with help from workers available mid-week on short notice. Spring launch is assured.
But my real progress the last 10 or so days is to gather from a trove of photos enough to tell the story of why we are building this garvey, and then the step by step construction. Its a pdf file in the list above, readable online via google drive.
Tom Gibson
August 24, 2014
Rik van Hemmen: Work has been progressing steadily, but the excitement of progress has kept us from keeping up to date with construction. This is an update on some of the recent work with the newest photos shown first.

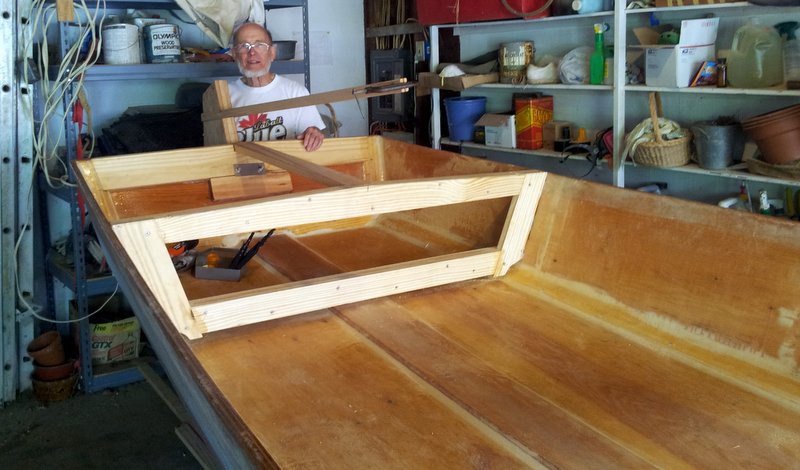
On August 23, 2014 we were getting serious about fitting internal structure. This is the first glimpse of the side benches we will be fitting. The plywood brackets will support the side benches and since there will no longer be a centerboard trunk, the central seating will be nothing short of luxurious. (Although fitting the mainsheet is going to take a little thinking).
The bright stripe in the foreground is the forward rowing thwart (although it will be installed lower in the boat) and Shannon is standing behind the aft thwart, which will also be the support for the Mizzen mast.
Shannon is standing in the skipper's cockpit, which will be the exclusive domain of the skipper and the bracket all the way in the stern will be the support for the skipper's private seat. We are talking real 21st century luxury here. (John Francchi is already planning cupholder locations)
That is a big open central area and, from a marine design point of view, it may result in too much torsional flex. We are going to try to control that flex with carefully designed internals and deck structure that integrate the coamings, the seats, and the side decks into one structural whole.
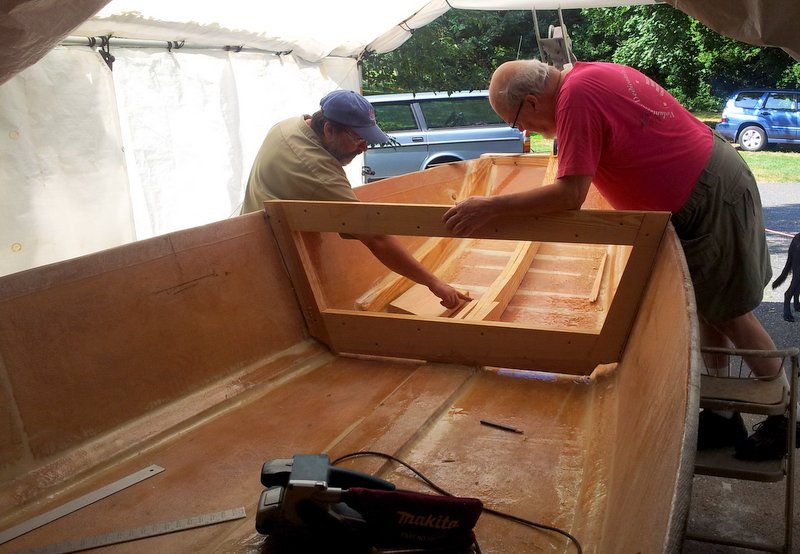
Tom worries almost as much as me and on a recent roll out while he, Charlie Gross (a rowing expert) and John Francchi worried about the proper thwart height in the boat, I took out a leeboard and the carved forward splashboard to make sure nothing was going to bite us in the butt. To get the leeboards to rotate just right is going to take some figuring but the preliminary fitting was encouraging and I did not notice any deal breakers. I really like the look of the leeboards; they look jaunty.
Hey, it is starting to look like a boat.
Remember, the fast majority of this work was done in two hour stints on Saturdays and only really started in January. Really quite impressive and a testament to elephant eating (How do you eat an elephant? A little bit at a time)
We are pretty much on budget too (Thanks Miller's Launch for allowing us to have a budget! I hope you take pride in our emerging new ride!)
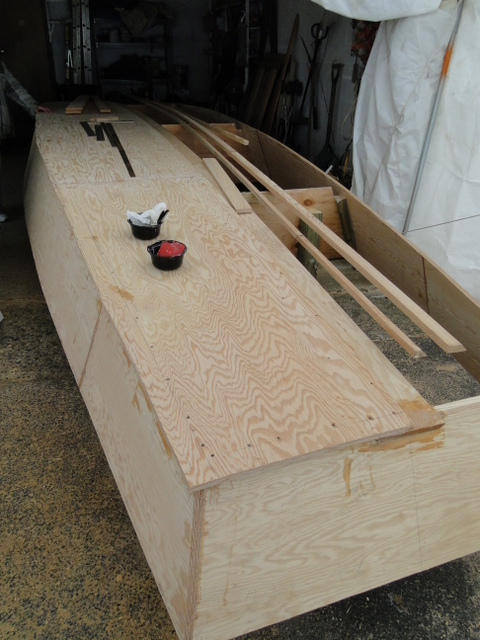
This is a recent roll out, where Tom is climbing into the boat to figure out the height for the forward thwart. The board that is clamped across the forward portion of the boat will be the forward splashboard. The white oak splashboard and the carving in it were donated by Scarano Boat and was delivered from Albany by water by the colonial sailing vessel Onrust. The carving says: "This machine contains all of Pete's hopes and dreams". It is an allusion to Clearwater's Pete Seeger and his banjo and it is almost poetic to think that this board has already traveled the length of Pete's stomping ground. If Pete were still alive maybe he would have written a song about this board.
The boat was rolled over and the inside was glassed next.
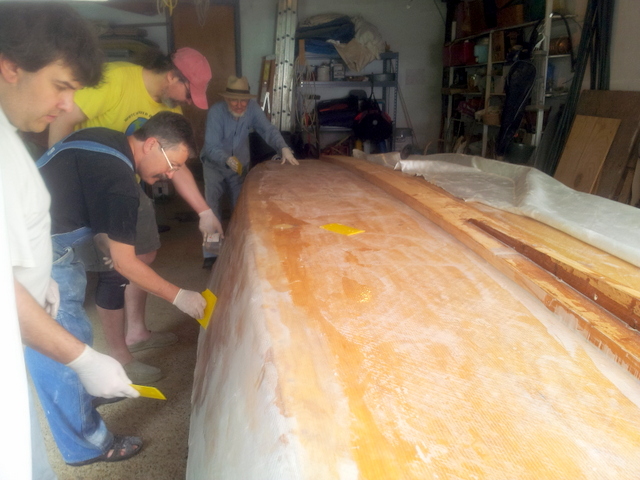
Glassing took up a good part of June and July. We were very lucky to have great turn outs for the glassing. For many this type of glassing was a new experience and it showed that real boat building is not just the beauty of wood, but also the almost zen like approach that is required to get the glass to drape, the epoxy to cure, and to achieve proper wetting and you can't rush it. Glassing in larger glass parties has a certain barn raising quality to it (I suppose that is why Wayne is dressed in Amish fashion here). If the team comes together, you feel like you can move mountains. The team consists of mixers, pourers, spreaders and finishers. And if there are a lot of people you can even run two teams.
I really got the sense that people enjoyed glassing. It is messy, but very manageable if you have teams. To do it alone is annoying because you become sticky and soon enough everything is sticky, but with teams you can work from clean to sticky and things work much faster and are just more fun.
In this photo we are glassing the hull sides. The bottom has already been glassed and the skeg and keel plank have already been fitted. The skeg and keel are glued white pine, but it was decided that these components would be outside the glass tub. In other words, we expect to see wear and tear on the external keel plank and skeg, but will simply replace it with a new one bonded to the tub when it wears (or rots) out.
The bottom and sides are bias ply glass that means the glass fibers run at 45 degrees to the centerline of the boat. Bias ply glass drapes much nicer, but, more importantly, the bias ply glass of top of the 0-90 orientation of the wood plies, creates a wicked strong and balanced structure, and should give the boat more torsional stiffness.
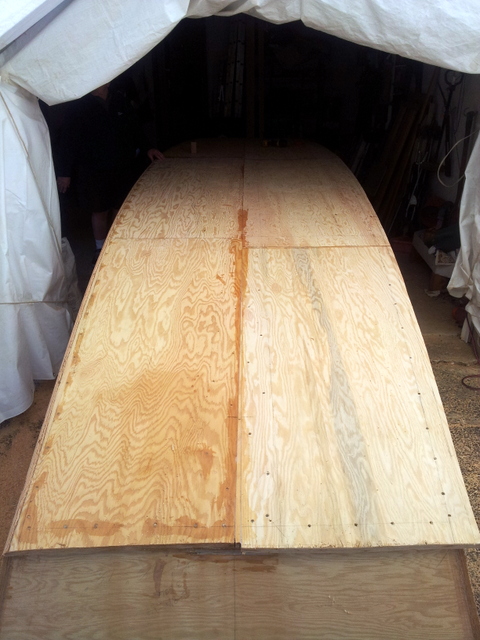
Here are some pictures where the bottom is starting to close up.
In the top left picture you can see the plywood keelson. In the top right picture the bottom plywood is butted at the keelson plank and screwed and glued down into the keelson and along the outboard edges.
The trimming of the bottom sheets takes minutes with a power planer and we sand it all nice and smooth before glassing.
The curved bow area was simply closed with cross planked strips of plywood. Once closed the board gaps were filled with epoxy paste and once glassed that will become one tough bow structure.
April 5: Ready to fit the port side chine logs and bottom board.
The Starboard side bottom board has been fitted. The two long strips of wood are the two piece chine logs that need to be fitted along the port side hull side so we have a screw and glue cleat for the port side bottom panel. This pic shows the temporary builders molds, and the plywood keelson also.
NOTE from Tom: I have been keeping the Quick Look document up to date instead of this log. But I do have log data and will update it soon. -- Tom Gibson, May 8.
updated: March 5
February 28: Scarfed the chine log, ready to glue. Reorganized the garage preparatory to assembly, Layed out the the port side cut plan.
February 22: Ripped the chine log. Retrieved canopy from NMHA trailer.
February 15: Lee boards weighted. Aft frame cut and glued. Bow chine log layed out.
February 9: Posted the "quick look" status sheet. Use the link above. This is a fairly complete to-do list, with X marks to show what is done and NEEDS to show upcoming shopping.
February 8: Lee boards epoxied. Forward frame parts cut out midweek. Forward frame glued up.
February 1: Port panel glued midweek. Stored. No need to draw cut plan as it will be traced from the starboard side when that side is cut out. Scarfed and glued the keelson. Lee boards sanded ready for first epoxy coat.
January 25: Gluing the starboard side panel done mid week by John and Tom. New worker Jim K drew the cut plan onto this panel. Stored the part. First gluing of port side panel.
January 18: Nice total at today's work party. Three crews.
The leeboard crew glued together two lee boards, each is two panels.
The side panel crew finished all scarfs and are ready to begin gluing.
The rudder crew examined and commented on Wayne's kick-up rudder model. Final design is close.
January 12: Posted the original garvey plans: (plans_4_up.pdf). Four pages can be taped together for larger view. Several workers asked for these to be posted. Thanks to Shannon Gilvary for the CAD work.
January 11: Really good work party today. See Photos. We had two teams working, one on scarfing four plywood planks roughly 2 x 8 feet each to one long 30+ foot plank. They got 2 of 3 needed double scarfs done. From that when glued we will cut one side. Then another side. The second team cut out blanks for the two lee boards. They are ready to glue. Workers were: Kevin, Jim, and John Franchi, Rik vanHemmen, Mathew Winchell, Bob McKay, Wayne DeVilbiss, Tom Gibson. Irene Gibson made black bean soup.
January 7, 2014: Meeting at Tom's house. Click for minutes / drawings...
Minutes,  rudder drawing,
  bathtub concept,
  bow and construction steps.
November 4: Charles has built the transom. Tom Gibson has cut blanks to make the stem.
November 1; Charles Gross has built the molds.October 24; The wood is purchased, and is in Tom's garage. Marine plywood, and Southern Yellow Pine.
Tuesday, September 24, 2013, 7:30 pm at Monmouth Boat Club. Tom and Rik presented the planning status. The plan was approved.
Links to relevant documents, and sites.
Construction Manual, 7 pages with drawings <<<=== UPDATE, 10-22, transom
History of the Clearwater Garvey, 2 page doc file
New Garvey - Archive Early planning documents, minutes, etc.